
If you’re trying a comfort-support patch for the first time (like FREEDOM), it’s normal to wonder:
- Where should I put it?
- Does “closer to the spot” matter?
- What if I don’t feel anything the first day?
Here’s the simple truth:
Placement matters. But consistency matters more.
This guide gives general, safe placement best practices so you can start simple, avoid common mistakes, and track what’s changing for you.
Disclaimer: This content is for general educational purposes and is not medical advice. Results vary by person. Patches aren’t intended to diagnose, treat, cure, or prevent disease.
Quick start (recommended)
- Want the comfort-support routine? Pain Relief Patch Hub →
- Not sure which goal to start with? Start Here →
- If sleep affects how you feel: Sleep Patch Hub →
- Shop / Sample Pack: https://mypatchworks.com/pricing
The “best” place to start (for most people)
If you just want a safe default that works for most routines:
Start with a comfortable, flat area you can repeat daily
Good beginner-friendly areas often include:
- upper arm / shoulder area
- upper chest (not on broken/irritated skin)
- upper back area (if you can reach it)
- outer thigh
Why these work: they tend to be flat, less sweaty, and easier to keep consistent.
Should you place it near the area you want to support?
Often, people like placing a comfort-support patch near the area they’re focused on (for example: around the general region), but you should avoid placing patches:
- directly on irritated/broken skin
- directly on a joint crease that bends constantly
- anywhere it rubs hard against clothing all day
Simple rule: Close is fine. Clean + comfortable + repeatable is better.
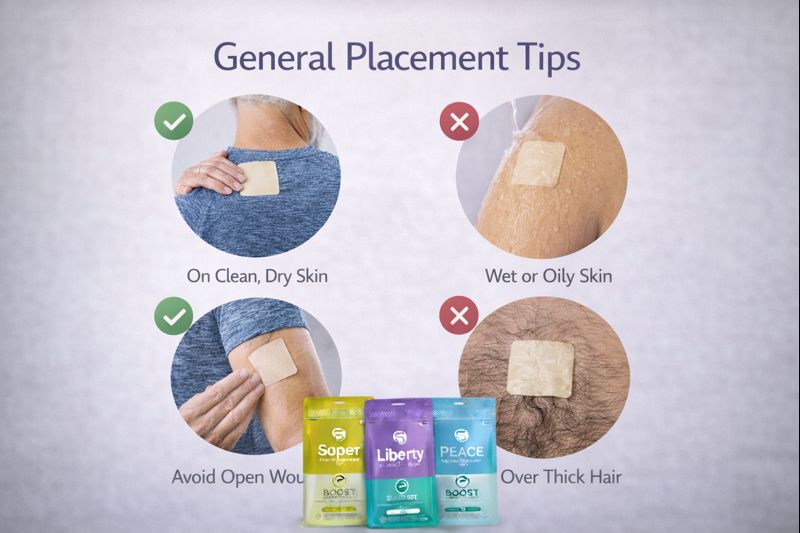
Best practices (do these every time)
1) Apply to clean, dry skin
- Avoid lotions/oils right before application
- If you sweat heavily, pick an area that stays drier
2) Avoid “high-movement” spots
Areas that constantly bend or rub can cause:
- peeling
- shifting
- inconsistent contact
Avoid:
- directly on elbows/knees
- waistbands
- under bra straps
- sock lines
3) Rotate spots to prevent irritation
If you notice skin sensitivity, rotate between 2–4 placement areas.
4) Don’t stack changes
If you’re testing a patch, don’t also change:
- caffeine timing
- workout intensity
- bedtime schedule
- new supplements… all at the same time.
Keep life “normal” so you can actually tell what’s helping.
The #1 mistake: moving it every day
If you change placement every day, you’ll never know what’s working.
The 5-day test (simple)
Pick one placement area and keep it there for 5 days.
Track 1–2 things:
- “comfort level” (1–10)
- “how easy did movement feel today?” (1–10)
After 5 days:
- If your trend is positive → keep going (7–14 days)
- If nothing changes → try a new placement area for another 5-day block
This is the fastest way to learn what works for you.

If comfort is worse at night, pair it with sleep support
A lot of people think they have a “comfort” problem when it’s really a sleep + recovery problem.
If you notice you feel worse after poor sleep:
- Keep your daytime comfort routine simple
- Add a consistent night routine
Next step:
Placement checklist (save this)
Before you apply, ask:
- ✅ Is the skin clean and dry?
- ✅ Is the spot flat and comfortable?
- ✅ Will it avoid constant rubbing/bending?
- ✅ Can I repeat this same placement for 5 days?
- ✅ Am I rotating sites if my skin gets sensitive?
If yes — you’re doing it right.
Bottom line
If you’re stuck wondering where to place a pain relief patch (comfort-support patch), start here:
- Choose a flat, comfortable, repeatable spot
- Avoid creases, friction, and irritated skin
- Keep placement consistent for 5 days
- Track a simple score so you can see what’s improving
Next steps: